vegan

vegan soup dumplings

Vegan Soup Dumplings with floral shape

Vegan Soup Dumplings with floral shape These vegan Soup Dumplings are super easy to make. Also they’re SUPER tasty and not any less delicious than their non-plant-based friends. In any case, in this recipe you’ll find: The step-by-step process of making a multicolored dough for steamed dumplings; Preparation of vegan filling and the “soup trick”; And the detailed demo of the floral dumplings assembly. If you watch the video until the end, as a BONUS, you’ll also witness the modern plating idea for these vegan soup dumplings. *for legal purposes, this video was not sponsored by Beyond Meat (but it could have been ????real fan here✌️). You can watch the full video of me making Vegan Soup Dumplings here Part 1 of 3 – Colorful steamed dumplings dough 340g AP flour (divided in 2 parts for 2 different colors) 100g boiling hot water (divided in 2 parts for 2 different colors) … FULL RECIPE INCLUDED WITH CULINARY ACADEMY Ingredients, you’ll need Directions Premix white food colorant into 40g of regular water.  Do the same for purple colorant. Set both aside. Take a medium-size bowl and mix together half of flour with half of boiling-hot water. Mix with chopsticks. …. Full Recipe is Part of the CULINARY ACADEMY Join TODAY and have access to all Classes + Recipes. Once enrolled, you’ll get a LIFETIME ACCESS to the academy, incl. all the new upcoming cooking lectures and modules and this recipe. https://youtu.be/a7XW5XodRE0 ENROLL now

Vegan Soup Dumplings with floral shape Read More »

Carob glazed vegetable Yakitori

Carob glazed vegetable Yakitori, Bechamel & burned pepper purée

Carob glazed vegetable Yakitori, Bechamel & burned pepper purée You probably think it’s an egg yolk and a glazed pork belly Yakitori. Well… it’s not. It’s actually just vegetables. Let me explain. This dish was inspired by 2021 S.Pellegrino Young Chefs competition, where the winner presented a totally vegetable focused dish. It’s about time, right? You can watch the full video of me making vegetable Yakitori here Part 1 – Vegan yolk 2 Orange bell peppers 1/4 tsp Turmeric powder 1/2 tsp MSG Calcium Lactate (3% of the final puree volume) 1g Sodium Alginate 200g Water Ingredients, you’ll need Directions Burn bell peppers on open fire. Peel the skin off and remove seeds. Discard.  Use the hand blender to puree the burned bell peppers flash. Add in Turmeric powder and MSG and puree to smooth consistency. Measure the final puree amount, add in Calcium Lactate and blend for another 1-2 minutes.  Use a piping bag or a basting syringe to transfer the puree into half-circle shaped silicon molds. Freeze. Meanwhile, prepare a Sodium Alginate bath by blending Sodium Alginate into water and letting it rest for 5-10 min.  Prepare 2 more clear water baths. Perform reverse spherification by placing the frozen pepper puree into the Sodium Alginate bath.  Transfer the spherified vegan yolk into a water bath to clean off any extra Sodium Alginate and finally transfer to the final water bath for keeping purposes. Part 2 – Plant-based Bechamel sauce 1L unsweetened Plant-based milk of your choice 1 Onion 4 Cloves 2 Bay leafs 30g AP flour 30g Vegetable oil Ingredients Directions Infuse milk with onion, cloves and bay leafs and strain through a cheesecloth. Make a white roux with flour and oil. Incorporate infused milk into the roux 1 ladle at a time. Simmer for about 20 min, until the Nappe consistency. Strain through the cheese cloth again and season.  Part 3 – Vegetable Yakitori small Pumpkin Large carrots Large parsnip 30g Carob syrup 30g Scotch 50g Brown sugar 50g Dark miso paste 20g Soy sauce 100g Water 10g Mustard 3 large fresh Rosemary sprig Ingredients Directions Burn the above vegetables (or other vegetables of your choice) on open fire. Remove the burned skins and seeds. Discard them. Cut the vegetables into precise and equal size rectangles. Blend all the other ingredients (except for Rosemary). Put a frying pan on heat, pour in the carob glaze liquid. When the glaze gets hot, add in 1 sprig of Rosemary, carrots and parsnips (the harder vegetables).  Cook and baste vegetables, until they are nearly done. Add in the pumpkin cuts. Repeat the procedure until all the veggies are done. Remove the glazed veggies from the pan. Plant the charred and glazed vegetables on 2 fresh Rosemary sprigs. Vegetable Yakitori is ready. Part 4 – Vegetable Yakitory assembly Pour 2 tbsp plant-based Bechamel sauce on a warm plate.  Place a vegan egg yolk inside the Bechamel sauce. Place the vegetable Yakitory on the side of the vegan “fried eggs”, a.k.a. Bechamel sauce and charred bell pepper puree. Enjoy!

Carob glazed vegetable Yakitori, Bechamel & burned pepper purée Read More »

Vegan Panna Cotta Isomalt Broken Golden Heart Dessert

Vegan Panna Cotta Isomalt Broken Golden Heart Dessert

Vegan Panna Cotta Isomalt Broken Golden Heart Dessert While everyone are making Dalgona candies from Squid Game, let me share with you how to make something actually beautiful and delicious with sugar.  In this post you’ll see the process of making a vegan dessert, that’s worth to be served at any fine dining Michelin Star restaurant.  That’s my response to all of you out there, who think that vegan dessert could be only overnight sweet oats and frozen nut-based cheesecake.  Today we’ll be making a vegan Panna Cotta using the best suitable molecular cuisine ingredient for this recipe: Kappa and Iota Carrageenans. All you need to know about cooking with Kappa Carrageenan Iota Carrageenan And we’ll finally use my favourite Isomalt to make a Golden Origami Heart shell. You can watch the full video of me making Vegan Panna Cotta Isomalt Broken Golden Heart Dessert here https://youtu.be/ZFMphIuQB8c Part 1 – Vegan Panna Cotta 200g Plant-based milk 1 Orange (peels only) 1 Vanilla Bean 0.2g Kappa Carrageenan 0.4g Iota Carrageenan Ingredients, you’ll need Directions Infuse the plant-based milk of your choice with orange peels and vanilla. Strain infused milk though a cheesecloth and cool down a little. Blend in Kappa and Iota Carrageenans. Hydrate Carrageenans by bring the mix to boil while continuously whisking. Pour the mixture to molds. Cool down in the fridge. Once fully set, unmold. Part 2 – Isomalt Golden Heart shell Isomalt Edible Gold spray Ingredients Directions Put on several layers of gloves to protect your hands from extreme heat. Isomalt will get super hot at this stage of the recipe. Make sure to handle it with caution. Melt the Isomalt by bringing it to simmer. Pour the melted Isomalt on to a silicon mat and start folding it. It will help the Isomalt cool down a little and incorporate air inside. Stretch and fold Isomalt to incorporate more air inside and cool it down further.  Cut a pc that you are going to continue working with. Make an indentation with your finger, stick the air pump inside. Make sure that it’s completely sealed. One way to do it is to heat the pump end and the part of Isomalt that should be attached to it. Start pumping with care. This is a very slow process and requires patience. Place the growing Isomalt ball inside the heart mold and keep on pumping as per demo. Carefully remove the heart shaped Isomalt shell and cut it open from the pump side creating an open shell, with a heated knife. This will take some time and extreme care as well. Wait until the shell cools down completely. Maybe even place it in the fridge for a few minutes and spray the heart shell with edible gold. Part 3 – Assembly of the Vegan Panna Cotta Isomalt Broken Golden Heart Dessert Place the vegan Panna Cotta on a plate, sprinkle the top with some dehydrated Peony flakes. Place some finger lime caviar on the side. Decorate with 3 edible flowers of your choice. Cover the vegan Panna Cotta with an Isomalt golden heart shaped shell. Serve and enjoy!

Vegan Panna Cotta Isomalt Broken Golden Heart Dessert Read More »

Magic TRAFFIC LIGHT peas [Molecular Gastronomy]

Magic TRAFFIC LIGHT peas [Molecular Gastronomy]

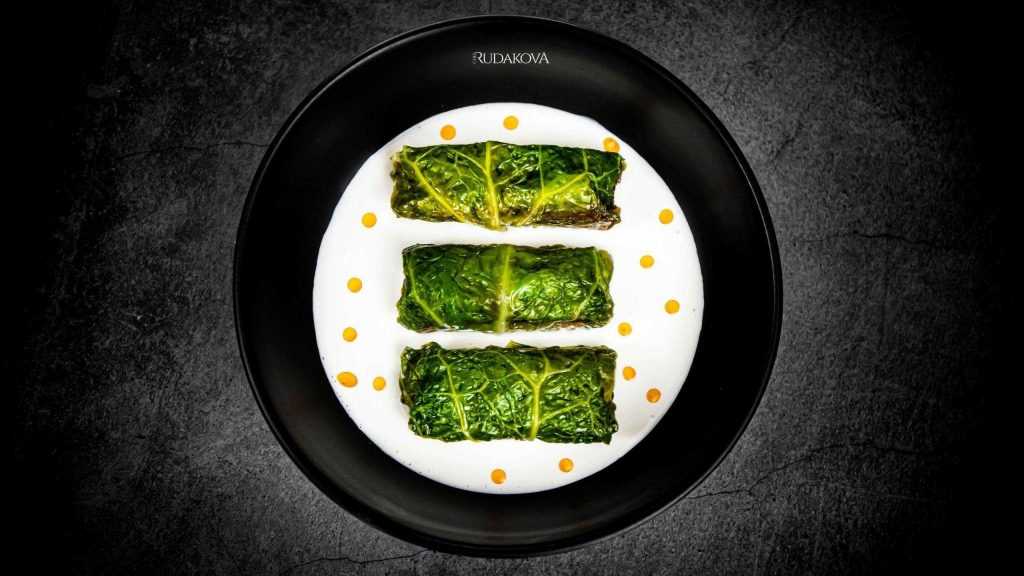
Magic TRAFFIC LIGHT peas [Molecular Gastronomy] Peas are in season, and summer is already in full bloom! So, why not create a colourful, FUN amuse-bouche for your guests, using this amazing fresh ingredient and modern culinary techniques? Let’s make Magic Traffic Light peas, using molecular gastronomy techniques.  In this post, I’ll show you how to use: seasonal ingredients (summer Peas, Strawberries & Loquat), modern molecular cuisine techniques (spherification method), and classic traditional methods (lactose fermentation) in order to create a fun, surprising, single-bite summer appetizer from the Chef for your guests. You can watch the full video of me making Magic TRAFFIC LIGHT peas here https://youtu.be/NolGxImJWlk Part 1 – Strawberry peas Strawberries Salt Smoked paprika Agar Agar Ingredients, you’ll need Directions Clean & wash strawberries. Measure the weight of strawberries and mix with 2% salt. Vacuum & seal salty strawberries for 1-2 days at room temperature to lacto-ferment. Cut open the bag with lacto-fermented strawberries. Blend strawberries with a little paprika & 1% (of the weight) of Agar Agar. Bring the strawberry mixture to boil, while continuously whisking to fully hydrate & activate Agar Agar. Pour the strawberry peas base into a squeeze bottle.  Pour a drop of strawberry peas base into a spoon and them drop this pea mix into an ice-cold oil. This will give a rapid cooling effect to the mixture and the Agar Agar will help to spherify the peas immediately, while they still keep the circular shape.  *Store in water in the fridge, until needed. Part 2 – Loquat peas Loquat fruit Salt Agar Agar Turmeric powder Ingredients Directions Clean, wash & peel Loquat fruit. Measure the weight of Loquat and mix with 2% salt. Vacuum & seal salty Loquat for 1-2 days at room temperature to lacto-ferment. Cut open the bag with lacto-fermented Loquat. Blend Loquat with a little Turmeric powder & 1% (of the weight) of Agar Agar. Bring the Loquat mixture to boil, while continuously whisking to fully hydrate & activate Agar Agar. Pour the Loquat peas base into a squeeze bottle.  Pour a drop of Loquat peas base into a spoon and them drop this pea mix into an ice-cold oil. This will give a rapid cooling effect to the mixture and the Agar Agar will help to spherify the peas immediately, while they still keep the circular shape.  *Store in water in the fridge, until needed. Part 3 – Green summer peas Peas Salt Sugar Vinegar Ingredients Directions Trim fresh peas. Remove the pea seeds from the pods.  Prepare the pickle mixture by combining 250g Water with 250g Vinegar, 1 tbsp Sugar and 1tbsp Salt. Bring to boil, so all the ingredients are completely dissolved; cool back to room temperature.  Pour the cold-pickle mix over the pea pods, and refrigerate for 1-2 days.  Part 4 – Magic TRAFFIC LIGHT peas assembly Plate the spherified colourful fruit peas along with real fresh peas in pickled pea pods.  Add a little chili oil (optional).   Tools, you might need for this recipe **Images below are linked to third party websites, such as Amazon. Should you chose to purchase any of those items there, Chef Rudakova will receive a small commission (at no extra cost to you). Microplane Zester Stand Mixer Food Digital Thermomether You might also like this Recommended Blog Posts Previous Next

Magic TRAFFIC LIGHT peas [Molecular Gastronomy] Read More »

How to make Stuffed Cabbage LIKE A CHEF | Vegan fine-dining ft. Sous Vide

How to make Stuffed Cabbage LIKE A CHEF | Vegan fine-dining ft. Sous Vide

Have I said, Vegan fine-dining is a thing?🤔 Yes, I have! In a rare scenario, that you still don’t believe me, check out this beautiful stuffed cabbage, and tell me I’m wrong… The cabbage is Savoy; The stuffing is a selection of mostly root vegetables; The culinary method of choice is Sous Vide, R.I.P. “how to cook vegetables Sous Vide”; The accompanying sauce is a sustainable vegetable broth with veg. cream & spicy infused oil✌ You can watch the full video of me making Vegan fine-dining Stuffed Cabbage here Part 1 – Cabbage 1 medium size Savoy cabbage Ingredients, you’ll need Directions Cut the core out of the cabbage. Submerge the whole cabbage head in boiling water, and cook until all the leaves that you need had separated. Shock the cabbage leaves in ice-water to stop the cooking process. Part 2 – Stuffing 1 Carrot 1 Parsnip 1 Potato 1 Beetroot 1 Fennel Ingredients Directions Peel & cut* into equal size pc all the vegetables. Line them up in rows (5 in total). Roll the vegetables tightly in the cabbage leaves. Place the stuffed cabbage rolls inside the Sous Vide safe bags. Add a little olive oil and salt, vacuum & seal. Set up the Sous Vide at 185F / 85C. Cook the vegan fine-dining stuffed cabbage for 40 min.  *Do not through away peels & trims. We will use them for the sustainable vegetable broth. Part 3 – Sustainable vegetable broth  Vegetable peels (clean) & trims (from Part 2) 1 medium size Onion / a few shallots Kombu leaves Dried shiitake  Vegan cream Confit garlic Salt Ingredients Directions Roast the vegetable peels & trims in the oven for 20-30 min at 450F / 232C, together with the unpeeled onion/shallots. Remove the roasted vegetables and into the large pot. Reduce the oven heat to 350F / 175C and keep on roasting the onion / shallots for a few more minutes, until completely soft inside. Meanwhile, add water, Kombu leaves and dried Shiitake to the pot and simmer undisturbed for 30 min.  Strain the stock through a cheesecloth. Blend together with roasted onion/shallots puree, vegan cream & confit garlic. Reheat. Season to taste. Tools, you might need for this recipe **Images below are linked to third party websites, such as Amazon. Should you chose to purchase any of those items there, Chef Rudakova will receive a small commission (at no extra cost to you). Sous Vide machine Stand Mixer Sous Vide container You might also like this Recommended Blog Posts Previous Next You can watch more of my cooking videos on my YouTube channel Modern gastronomy, vegan recipes, recreation of famous dishes and much more Watch now

How to make Stuffed Cabbage LIKE A CHEF | Vegan fine-dining ft. Sous Vide Read More »