Recipes

Meringue shards

Meringue Shards

Meringue Shards It turns out Meringues are such a cool thing to play and create with in food! In this post I’ll share with you a quick and easy recipe of making colorful meringue shards. However, this same recipe can be used to make numerous other cool things with a meringue base, like meringue sticks, a.k.a. batons, or even whole edible meringue paintings. You can watch the full video of me making Potato Ice Cream, decorated with Meringue Shards here Meringue shards recipe 3 egg whites 200g Icing sugar 1/4 tsp Cream of TarTar Rum extract Food colourant of your choice Ingredients, you’ll need Directions Bring eggs whites to room temperature and start whipping on medium (going to high) speed. Once you get some foam forming, add in all the icing sugar at once (stop the mixer for that 🙂 ), Cream of TarTar and Rum. Mix at high speed to firm / stiff peaks.  Stop the mixer divide the meringue base into as many parts, as colors you wish to have. Add in the food colourant/s and mix with a spatula, until the colour is evenly distributed. Take a large baking tray, lined with parchment paper. Spread one meringue base and even it out with an offset spatula.  Add in drops of splashes (get creative, do whatever you want at this point) of meringues of other colours and create the texture and pattern with the same offset spatula or regular spatula or even your fingers (clean, of course…). Once you get the right picture, ether leave it like this, or (as I did) circe out the meringues using a round mold and something to remove extra meringue around the mold and really separate the meringue shard from the rest fo the meringue. Bake at 100-110C / 210-230F for 30-40 min.  Enjoy!

Meringue Shards Read More »

Apple Fett

Apple puff pastry pie recipe, you’ll love to make & EAT!

Apple puff pastry pie recipe, you’ll love to make & EAT! Apple Fett is an apple puff pastry pie with layered filling. Filling includes an apple, a la apple dumpling, feta cheese and almond paste. For the cooking technique, check out the video. And, as for the written recipe, you can find it here. You can watch the full video of me making Apple Fett here Part 1 – Blitz puff pastry 250g Bread flour 250g Pastry flour 7g Salt 250g Ice-cold water 500g Butter (cut into large cubes) Ingredients, you’ll need Directions Mix the flours together. In a separate bowl whisk salt into water. Cut butter into large cubes and mix into the flour mix.  Mix salted water into the buttery flour. Work the dough just to the point there’s no flour left and dough forms. Rest in the fridge for 20 min. Roll the dough in 1 directions to about 1/2 inch thickness, or until it stops stretching.  Fold the dough as per demo 3 times with 15-20 min intervals in the fridge. Part 2 – Apples 2 Granny Smith apples 1 Lime Ingredients Directions Remove the core from apples. Pill. Cut in half. Juice the lime and pour the juice over apples to prevent oxidation. Feta filling 200g Feta cheese 15g Berry jam Ingredients Directions Break Feta cheese apart. Mix with berry jam. Transfer to the piping bag and reserve. Almond paste filling 200g Almond flour 140g Icing sugar 120g Sesame paste 60g Vegetable oil 20g Rum 25g Corn starch Green food colorant Ingredients Directions Process all the ingredients in a food processor, until evenly mixed. Saute in a pop-stick pan to melt the sugars. Cool down and reserve. Part 4 – Apple puff pastry pie assembly & baking Use a small round bowl to pre-assemble the layered filling for apple puff pastry pie, as per demo in the video. Cut out puff pastry circles of 2 different sizes and chill, until needed. Place a small circle on baking paper, pre-assembled layered filling in the middle and large pastry circle on top. Use egg wash to attach both pastry circles together. Make sure the pie is smooth and the pastry is not stretched in any way. Decorate the edges as per demo (optional). Egg wash and refrigerate for 20 min. Create wavy patterns with a blade or a sharp knife (optional) as per demo. Egg wash and bake for 20-30 min at 430F / 220C.  Remove from the oven, sprinkle some icing sugar on top and bake for additional 2-3 min, until sugar melts and creates a tanned glossy look. Let the apple puff pastry pie cool down for about 10 min, serve and enjoy!

Apple puff pastry pie recipe, you’ll love to make & EAT! Read More »

vegan soup dumplings

Vegan Soup Dumplings with floral shape

Vegan Soup Dumplings with floral shape These vegan Soup Dumplings are super easy to make. Also they’re SUPER tasty and not any less delicious than their non-plant-based friends. In any case, in this recipe you’ll find: The step-by-step process of making a multicolored dough for steamed dumplings; Preparation of vegan filling and the “soup trick”; And the detailed demo of the floral dumplings assembly. If you watch the video until the end, as a BONUS, you’ll also witness the modern plating idea for these vegan soup dumplings. *for legal purposes, this video was not sponsored by Beyond Meat (but it could have been ????real fan here✌️). You can watch the full video of me making Vegan Soup Dumplings here Part 1 of 3 – Colorful steamed dumplings dough 340g AP flour (divided in 2 parts for 2 different colors) 100g boiling hot water (divided in 2 parts for 2 different colors) … FULL RECIPE INCLUDED WITH CULINARY ACADEMY Ingredients, you’ll need Directions Premix white food colorant into 40g of regular water.  Do the same for purple colorant. Set both aside. Take a medium-size bowl and mix together half of flour with half of boiling-hot water. Mix with chopsticks. …. Full Recipe is Part of the CULINARY ACADEMY Join TODAY and have access to all Classes + Recipes. Once enrolled, you’ll get a LIFETIME ACCESS to the academy, incl. all the new upcoming cooking lectures and modules and this recipe. https://youtu.be/a7XW5XodRE0 ENROLL now

Vegan Soup Dumplings with floral shape Read More »

Holiday Spirit | Chocolate dessert with a surprise inside

Holiday Spirit | Chocolate dessert with a surprise inside

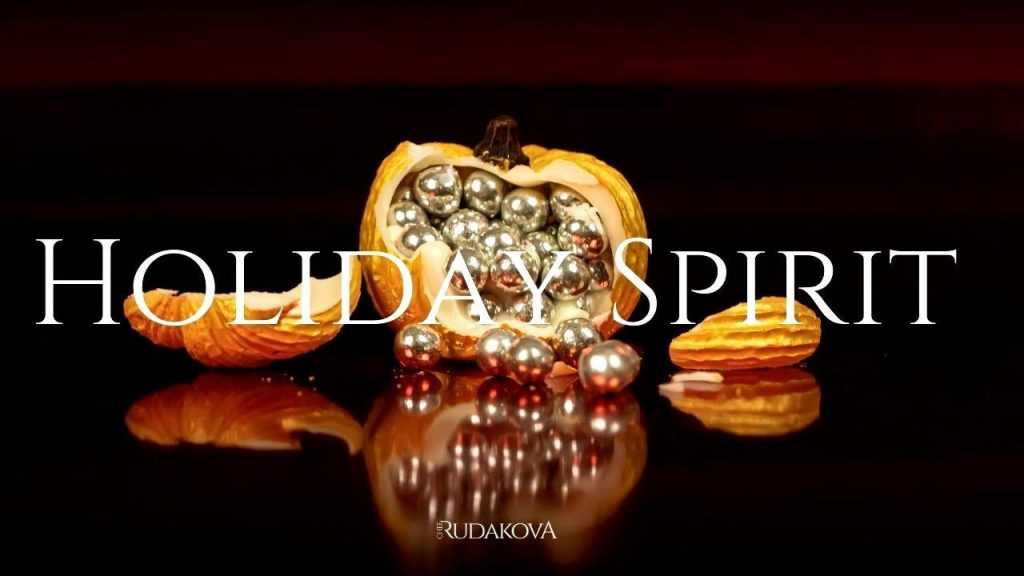
Holiday Spirit | Chocolate dessert with a surprise inside I don’t know how about you, but I’m already fully into the Holiday Spirit! Halloween passed, Thanksgiving is just out of the door, and Christmas is in the air! Being under influence of this strong Holiday Spirit presence, I’ve decided to cook something that falls right in between the feeling of all those holidays. And as a bonus, also practice my chocolate skills. Today we’ll be making a holiday chocolate dessert with a surprise inside. More than that, we’ll make 3 different variations of this dessert: using classical bonbon making technique, molecular cuisine direct spherification, edible gold spraying, and more. So, get out your pumpkin spice lattes & warm socks, and enjoy this new recipe✌???? You can watch the full video of me making this Holiday Spirit Chocolate dessert here Part 1 – Pumpkin stem & shell 250g Dark chocolate 250g White chocolate 1/4 tsp edible blue colourant Ingredients, you’ll need Directions Melt a little bit of the dark chocolate and temper using seeding method. Use a pipette or a syringe to pipe out small amounts of dark chocolate into the pumpkin stem cavity inside the molds. Put the molds in the fridge to set the stems. Meanwhile, melt more dark chocolate, temper with seeding method. Take a separate bowl, add blue colourant and 1 tbsp of melted chocolate, mix. Add more chocolate and mix again. Repeat the process until all the chocolate is mixed and darker in colour. In a separate bowl melt & temper the white chocolate. Take out the molds. Use piping bags to fill up 1 mold with dark chocolate and 2 molds with while chocolate. All the way to the top. Turn the molds with chocolate upside-down and let most of the chocolate to get out. Don’t worry, some chocolate will remain inside, covering the inner sides. Put the molds back to the fridge to set the chocolate. Part 2 – Pink gooey filling 100g White chocolate 70g Milk 1/4 tsp edible pink colourant Ingredients Directions Melt the white chocolate on a double boiler. Warm up the milk. Mix milk with pink colourant. Mix pink milk with melted chocolate. Use a piping back to pipe the gooey pink chocolate inside one of the molds with white chocolate shell. Don’t pipe all the way to the top. Leave about 0.5 cm off the top. Put this mold to the freezer and let it completely freeze. Take it out of the freeze, pipe in more melted and tempered while chocolate to seal the top. Let it set in the fridge. Unmold. Part 3 – Vegan caviar | Cranberry pumpkin spice pearls 200g Cranberries 1tsp Cinnamon powder 1tsp Allspice powder 1 tsp Nutmeg powder Agar Agar powder 1L Veg. oil (ice cold) Ingredients Directions Juice the cranberries and strain through a cheesecloth. Mix the cranberry juice with pumpkin spice mix. Measure the liquid amount and mix with 1% Agar Agar. Use a pipette to pipe small amounts of cranberry Agar mix into the ice-cold oil. Oil will help to encapsulate the vegan caviar drops and cool them down immediately.  Drain the caviar and transfer to the pumpkin mold with dark chocolate shell. Pour over a little more dark chocolate to seal the pumpkin at the bottom. Let set in the fridge and unmold. Part 4 – Holiday Spirit chocolate pumpkins assembly Fill up the last mold with silver chocolate balls (you can buy them from the food store; look in the confectionary/baking section), and seal with white chocolate as others. Onmold carefully all the molds. Spray one of the white pumpkins with edible gold. Use a sponge to decorate a dark chocolate pumpkin with powdered gold. Let the white chocolate pumkin with gooey pink madness inside defrost in the fridge for 1 hours. Enjoy your Holiday Spirit Chocolate dessert with surprise inside!

Holiday Spirit | Chocolate dessert with a surprise inside Read More »

Carob glazed vegetable Yakitori

Carob glazed vegetable Yakitori, Bechamel & burned pepper purée

Carob glazed vegetable Yakitori, Bechamel & burned pepper purée You probably think it’s an egg yolk and a glazed pork belly Yakitori. Well… it’s not. It’s actually just vegetables. Let me explain. This dish was inspired by 2021 S.Pellegrino Young Chefs competition, where the winner presented a totally vegetable focused dish. It’s about time, right? You can watch the full video of me making vegetable Yakitori here Part 1 – Vegan yolk 2 Orange bell peppers 1/4 tsp Turmeric powder 1/2 tsp MSG Calcium Lactate (3% of the final puree volume) 1g Sodium Alginate 200g Water Ingredients, you’ll need Directions Burn bell peppers on open fire. Peel the skin off and remove seeds. Discard.  Use the hand blender to puree the burned bell peppers flash. Add in Turmeric powder and MSG and puree to smooth consistency. Measure the final puree amount, add in Calcium Lactate and blend for another 1-2 minutes.  Use a piping bag or a basting syringe to transfer the puree into half-circle shaped silicon molds. Freeze. Meanwhile, prepare a Sodium Alginate bath by blending Sodium Alginate into water and letting it rest for 5-10 min.  Prepare 2 more clear water baths. Perform reverse spherification by placing the frozen pepper puree into the Sodium Alginate bath.  Transfer the spherified vegan yolk into a water bath to clean off any extra Sodium Alginate and finally transfer to the final water bath for keeping purposes. Part 2 – Plant-based Bechamel sauce 1L unsweetened Plant-based milk of your choice 1 Onion 4 Cloves 2 Bay leafs 30g AP flour 30g Vegetable oil Ingredients Directions Infuse milk with onion, cloves and bay leafs and strain through a cheesecloth. Make a white roux with flour and oil. Incorporate infused milk into the roux 1 ladle at a time. Simmer for about 20 min, until the Nappe consistency. Strain through the cheese cloth again and season.  Part 3 – Vegetable Yakitori small Pumpkin Large carrots Large parsnip 30g Carob syrup 30g Scotch 50g Brown sugar 50g Dark miso paste 20g Soy sauce 100g Water 10g Mustard 3 large fresh Rosemary sprig Ingredients Directions Burn the above vegetables (or other vegetables of your choice) on open fire. Remove the burned skins and seeds. Discard them. Cut the vegetables into precise and equal size rectangles. Blend all the other ingredients (except for Rosemary). Put a frying pan on heat, pour in the carob glaze liquid. When the glaze gets hot, add in 1 sprig of Rosemary, carrots and parsnips (the harder vegetables).  Cook and baste vegetables, until they are nearly done. Add in the pumpkin cuts. Repeat the procedure until all the veggies are done. Remove the glazed veggies from the pan. Plant the charred and glazed vegetables on 2 fresh Rosemary sprigs. Vegetable Yakitori is ready. Part 4 – Vegetable Yakitory assembly Pour 2 tbsp plant-based Bechamel sauce on a warm plate.  Place a vegan egg yolk inside the Bechamel sauce. Place the vegetable Yakitory on the side of the vegan “fried eggs”, a.k.a. Bechamel sauce and charred bell pepper puree. Enjoy!

Carob glazed vegetable Yakitori, Bechamel & burned pepper purée Read More »